Crunchy Mama's Urban Homestead

Come learn about awesome plants on my homestead

More on the Sprouting Tower

Reading instructions is such a good idea! 😉

While writing my last post on the Victorio VKP1014 4-Tray Kitchen Seed Sprouter, I included a link to the instructions for my specific tower (I found those instructions from a reviewer of the product on Amazon).

Tray of alfalfa sprouts grown from the proper amount of seed (1 1/2 teaspoons)

Tray of alfalfa sprouts grown from the proper amount of seed (1 1/2 teaspoons)


I had purchased this tower several years ago and I lost the instructions.  When I got back into sprouting recently, I just guessed at how much seed to put in each tray. Well, the amount of seed matters – imagine that!! After reading the instructions, I realized that I was putting way too much seed in each sprouter — maybe 3 times the amount.  Because of that, I felt the need to stir the seeds with each rinse/drain cycle.

I hope that this helps!  Let me know if you have a question or a comment!

Thanks for reading.  If you enjoyed this post, please click the “LIKE” button and consider subscribing via email, Twitter ,  Pinterest or your favorite reader.  I’m also on Instagram.

Leave a comment »

Sprouting Towers — avoiding trouble with them

A few years ago I purchased what I refer to as a sprouting tower.  Sprouting towers can be trouble but you might be able to get yours to work for some seeds.  Some of the complaints about them is that seeds don’t sprout well in them or the seeds start to rot.

Victorio VKP1014 4-Tray Kitchen Seed Sprouter

You might think that this is a magical little contraption into which you just put seeds in, pour water in the top tray twice a day, empty the bottom tray of water, and in a few days, you will have sprouts.  Well, it doesn’t quite work that way — at least for some people and some seed.  You have to give the seeds in a tower a little more attention than those sprouting in a jar.

I actually do like the tower for alfalfa seeds. However, when using a tower, I have found that I can’t just pour water into the top and remove the water from the collection bin at the bottom. The seeds need to get some air and need to get stirred (with my finger) when I put the water in. So, twice a day I take the tower apart to give the seeds in each tray air while I am giving each of the trays some fresh water. I pour the water in, sniff the trays to make sure that the sprouts smell as they should, swirl the water and seeds around with my finger. (I plan on posting about using 4 of your 5 senses when you are growing sprouts).  Then I stack the tower trays back up until the next rinse/drain cycle HOWEVER I DON’T snap the lid on (that would prevent good drainage).  I simply place the lid on loosely.

I also make sure to watch closely for when the trays need to be cleaned with soap.  They can start to get slimy around the underside rims.  Also, the tiny holes can get clogged.  You can use a paper clip end to clean them out or use your mouth to blow out the clogging seed or hull.

I hope that that helps.

These towers are about $20 each.  I’m not sure that I’d buy one again but since I have it and I’ve learned how to make it work for me I do use it — pretty much exclusively for alfalfa seeds.

Lastly, if you have one of these and need the instruction manual, here it is: http://www.rawnutrition.ca/img/product/description/Victorio%20Seed%20Sprouter%20VKP1014%20User%20Manual.pdf

I’d love to hear from you.  Do you use one of these towers?  If so, what has been your experience?

Thanks for reading.  If you enjoyed this post, please click the “LIKE” button and consider subscribing via email, Twitter ,  Pinterest or your favorite reader.  I’m also on Instagram.

2 Comments »

Onto our new and exciting journey in Michigan

A warm greeting from the Mitten!  We have been in our new home for 3 months and things are going wonderfully.  We actually really love our new area, even though we are in the heart of the suburbs.  It may be big and traffic might be awful sometimes but I like to look on the bright side.  There are a lot of very interesting places to visit and a lot people with similar interests here: Permaculture, holistic living, etc.  With the help of Facebook and Meetup, I have joined some homeschooling/unschooling groups and Permaculture groups and have made friends quickly.

Now that the craziness of moving, settling in, and the holiday season are just about over, I am really looking forward to increasing my knowledge base through reading.  Thankfully, Michigan has a similar inter-library loan system to what Ohio has and I have requested a slew of books on Permaculture and related topics.  I plan on sharing my thoughts on the books as I read through them.

I also have been able to go to several in-person workshops (or skillshares) hosted by the various Permaculture groups that I participate in.  In November, I attended two different workshops: a rocket stove workshop as well as a “making hard cider” demonstration.  In December, I attended a meeting wherein three presenters presented their craft in short demonstrations: carving wooden spoons, making paper and wool felting.  I was really intrigued with the wool felting.  The presenter said that she doesn’t like knitting or sewing but really found that she likes wool felting.  I am not enthusiastic about knitting or sewing either.  I prefer other crafts such as soap-making, growing plants, and cooking.

In November, a co-leader of my county’s Permaculture group put a call out to invite people to present a skillshare at future meetups.  I offered to present on seed sprouting, soap-making, and baking artisan bread.  She took me up on my offer.  In a few weeks, I’ll be presenting on sprouting seeds for eating (not gardening) and then in March I will be presenting on cold process soap making.

alfalfa seeds sprouting in a sprouting tower

alfalfa seeds sprouting in a sprouting tower

In preparation for my sprouting presentation, I am doing a lot of researching — revisiting what I already know but also expanding my knowledge base and my experience (by sprouting a larger variety of seeds).  I am really, really glad that I am.  I am learning so much.  I have also improved my previous sprouting techniques.  So, I plan on posting a series here on the blog about my adventures in sprouting seeds for eating.

There is more to write but I will save that for later.  Happy New Year to each of you!

Thanks for reading.  If you enjoyed this post, please click the “LIKE” button and consider subscribing via email, Twitter ,  Pinterest or your favorite reader.

1 Comment »

Saying good-bye to our urban homestead

After 8 wonderful years, we are leaving our beloved urban homestead in NW Ohio.  We are headed north because a new job for hubby.  We will be renting a home in a suburb of Detroit and I will be giving up our chicken flock.  Our new home does have a space that looks like it was once a garden so perhaps I will continue gardening next year. While this particular chapter of our life closes, we look with joy and anticipation at the new adventure awaiting us.

I am hoping to do some foraging and, if I do and have something worth sharing, I will post here.  Until next time, I wish you all a happy and joyous autumn and winter!

4 Comments »

On wild foods and food allergies

A quote from one of my absolute favorite wild edible books, Nature’s Garden by Sam Thayer.

A must-have book for foragers in temperate climates

“There is a slight possibility that you could be allergic or intolerant to a plant that is normally edible.  Thousands of people are affected by allergies to familiar foods such as peanuts, almonds, mangoes, and cashews…the forager is exposed to new foods on a regular basis…Food allergies are an inescapable and unpredictable fact of life. To use wild foods you must assume this risk.  However, such reactions are rare” (30-31).


Thanks for reading.  If you enjoyed this post, please click the “LIKE” button and consider subscribing via email, Twitter ,  Pinterest or your favorite reader.

Leave a comment »

Giant Hogweed — you NEED to know this dangerous plant

Greetings, friends!  I live in the Great Lakes region but for some strange reason I had never heard of this horrifying plant until this year.  When Michigan herbalist, jim mcdonald, posted in April on his Facebook page his “obligatory annual GIANT HOGWEED post” (find it at the bottom of this post), it was the first time I’d heard of it.  Then at the end of May, after stumbling upon a story in a Detroit news outlet titled (alarmingly),  “Michiganders warned of dangerous hogweed“, I decided that I needed to learn about this plant as thoroughly as possible and share what I have found.

The short summary is this: The sap of this plant will give a person a horrifyingly nasty and painful skin rash that will last for weeks.  If the sap gets into a person’s eyes, it will cause blindness (one source says temporary blindness).  The toxin (which is in the class of phytochemicals called furanocoumarin) in the sap  is activated by UV rays (phytophotodermatitis).  According to Midwest Invasive Plant Network, giant hogweed is a perennial herbaceous plant that, by the 4th or 5th year, produces a 7-15 foot flower stalk.  Before then its form is a rosette that grows bigger and bigger each year until it is ready to produce that humongous flower stalk and gigantic  flower umbels.

Note: there are several “well-known” plants that are related to giant hogweed (Heracleum mantegazzianum).  Some of them are common hogweed, wild parsnip, cow parsnip, Queen Anne’s lace (wild carrot) and poison hemlock.

giant hogweed courtesy 2washington post

Why is this plant so dangerous?  According to this CBC report, “The toxins in the sap can create what is known as “phytophotodermatitis” — basically an extreme sensitivity to sunlight. The effects of the toxins are not felt immediately, but once activated by UV rays, they can damage skin cells and cause lesions that look similar to burns.”

Here is more information about giant hogweed:

  • The scientific name is Heracleum mantegazzianum.
  • The range for this plant is:  In the western half of North America, it is found in Oregon, Washington and British Columbia.  In the eastern half of N. Am., it is found in only some of the states/provinces in the Great Lakes region as well as in most of New England and in North Carolina.  According to this USDA map, the states in the eastern US that have giant hogweed are as follows: (from west to east) IL, MI, NC, PA, NY, CT, MA, and ME (more states from other sources listed below).  All of eastern Canada is highlighted on the map as having giant hogweed present.  If you live in one of those affected areas, I encourage you to click on the link to get to the map; then below the map you will see that most of the states affected have a link to county distributions.  Not all counties within the states have giant hogweed present.  According to Midwest Invasive Plant Network and this pdf, northern Wisconsin, northern Indiana and eastern Ohio also have giant hogweed present.  According to this USDA Forest Service webpage, this plant is found also in Maryland, New Jersey, Vermont and New Hampshire.
  • What it looks like as a shoot and small plant (early stages of growth): It grows in a rosette for several years before it sends up a flower stem to produce seeds (after which the plant dies; it is a monocarpic plant).  The seedling leafs are spiked and have a pronounced jagged appearance.
  • Profile of the stem: Like most of the plants in the Apiaceae family, it has a hollow stem.  It can have noticeable purple splotches on the stem.  The stem is covered in coarse hairs (bristle).
  • Profile of the mature leaves: “On mature plants, leaves are divided into three equal or almost equal parts which are then divided into a further 3 parts (ternate)” and  “Lateral leaflets have blade touching main stem with no petioles (leaf stalk)” Source “Hairs are also found under the leaves. The plant produces a clear, watery sap that is found in the hairs and stem.” Source
  • Profile of the flowers: white flowers in multiple, large umbels (think umbrellas); 50-150 rays per main umbel Source
  • Habitat: likes moist soil such as near rivers
  • Time of year for its life cycle: blooms in June in Ontario; my guess is that it blooms in spring in places south of Ontario.  But remember that blooming is the last stage of life for this plant.  As stated previously, it spends 4 – 5 years as a rosette so be on the look out for the rosettes since they can be as toxic but not as noticeable as the large flower stalk.

If videos are helpful for you to commit this plant’s features to memory, please check out the following videos by Chris Phyto:

Links to check out, especially if you live in an area where giant hogweed is present; it’s good to see the various photos of the plant:

Plant geek info:

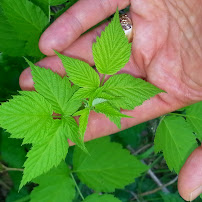
Family: Apiaceae (or Umbelliferae)

Genus: Heracleum 

Species: mantegazzianum

Common names: giant hogweed, cartwheel-flower, giant cow parsnip,”hogsbane” or giant cow parsley (source)

Thanks for reading.  If you enjoyed this post, please click the “LIKE” button and consider subscribing via email, Twitter ,  Pinterest or your favorite reader.

*****************************************************************************************************************************************

Below is the post from jim mcdonald:

the obligatory annual GIANT HOGWEED post; please feel free to share or copy and paste it onto any and all of the hundred thousand threads on the topic:

Giant hogweed possesses the same photosensitizing compounds found in parsnip (and not just wild parsnip, as “garden parsnip” and “wild parsnip” are the *same* species, Pastinaca sativa). It’s the sap that’s so bad; if you just touch the plant you won’t melt like the wicked witch in the Wizard of Oz… But *don’t* try pulling it up or chopping it down. The plant is freakin’ huge, so pretty easy to ID. It’s not like you won’t notice it.

Cow parsnip, hogweed and wild parsnip are of a wholly different breed than poison ivy; the sap contains furocoumarins and is photosensitizing, it increases the effects for sun exposure. Here’s a nice overview, as related to wild parsnip (but, again, it applies to garden & cow parsnip and hogweed):

“This section is adapted from the excellent article on wild parsnip burns by David Eagan (1999). Wild parsnip is of concern because humans develop a severe skin irritation from contact with its leaves. Plants have chemicals called psoralens (more precisely, furocoumarins) that cause phyto-photodermatitis: an interaction between plants (phyto) and light (photo) that induce skin (derm) inflammation (itis).

Once the furocoumarins are absorbed by the skin, they are energized by uv light on both sunny and cloudy days. They then bind to DNA and cell membranes, destroying cells and skin. Parsnip burns usually occur in streaks and elongated spots, reflecting where a damaged leaf or stem moved across the skin before exposure to sunlight.

Wild parsnip burns differ from the rash caused by poison ivy in several aspects. First, everyone is sensitive to wild parsnip and you do not need to be sensitized by a prior exposure to develop burns or blisters. You can brush against wild parsnip plants and not be affected. Parsnip is only dangerous when the plant sap from broken leaves or stems gets on your skin. Lastly, the wild parsnip’s “burn” is usually less irritating that poison ivy’s “itch.” The worst of the burning pain caused by wild parsnip is usually over within a couple of days while the rash and itch of poison ivy can last a long time.

In cases of mild exposure to wild parsnip, affected areas turn red and fell sunburned. In severe cases, the skin first turns red and then blisters form. The arms, legs, torso, face, and neck are most vulnerable and affected areas may feel like they have been scalded. Blisters form a day or two after sun exposure and soon after the blisters rupture and the skin starts healing. But for many people the ordeal is not over as dark red or brownish “scars” remain in the burned areas for several months to years. Animals can also get parsnip burns if they have little hair and lightly pigmented skin, characteristics that allow the chemical and sunlight to reach the skin.

The burning sensation can be relieved by covering the affected areas with a cool, wet cloth. Try to delay blisters from rupturing as long as possible as blisters protect the skin by keeping it moist and clean while the areas heal. For those cases with extensive blistering, consult a doctor.

Tips to avoid exposure include wearing gloves, long pants, and long-sleeved shirts. Planning control activities for the early evening will minimize sunlight and thus activation of the blistering process. If you are exposed to the plant juice, wash the contaminated areas thoroughly as soon as possible.”

Leave a comment »

Amazing Tapenade Recipe – a flavor delight in your mouth

My mouth is so happy right now!  I made this amazing tapenade (pronounced tah-pen-AHD) and it is so delicious I just had to share.

I was asked to make some artisan bread for my sister-in-love’s surprise birthday party.  I figured that it would be good to make a spread to go with it and I remembered that tapenade was delightful.  It’s not in my regular rotation of foods that I make but I need to change that!

artisan bread and tapenade

I looked up a few recipes online and then came up with my own with the ingredients that I had on hand.

Most recipes called for a combo of olives, anchovies, olive oil, lemon juice, garlic, capers and some herbs such as oregano, thyme and rosemary.

Here is what I threw into my food processor:

  • 2 c. kalamata olives, pitted
  • 2 oz. tin of anchovies in olive oil
  • juice of 1 lemon
  • 1 clove garlic
  • the leafy tops of three oregano stems growing in my garden
  • the leaves off of 2 thyme stems growing in my garden

I usually have capers but I ran out a few weeks ago and I haven’t purchased more yet.  Boo-hiss!  They would have been great in this spread.

I just love the salty, savory and tangy flavor or tapenade!  I’d love to hear from you.  Do you have a favorite tapenade recipe that you’d like to share?

Thanks for reading.  If you enjoyed this post, please click the “LIKE” button and consider subscribing via email, Twitter ,  Pinterest or your favorite reader.


2 Comments »

Today’s Savory Green Smoothie Combo

Today’s green smoothie is savory and warm; it was my first time making this combo – it included:

  • 2 roma tomatoes
  • 1 cup torn Swiss chard (stems removed)
  • 1 cup torn collard greens (stems removed)
  • juice of one lemon
  • a few sprigs of parsley (no stems)
  • 1 1/2 cup warm water

savory smoothie     savory smoothie in blender

I was pleasantly surprised that I didn’t feel that I needed to add any salt or hot sauce or seasonings to this smoothie.  The chard is naturally salty.

Thanks for reading.  If you enjoyed this post, please click the “LIKE” button and consider subscribing via email, Twitter ,  Pinterest or your favorite reader.

2 Comments »

Consuming Raspberry Leaves

I have an amazing amount of wild spinach (Chenopodium album) and that makes up the bulk of our greens but I also pick a few other types of leaves including young grape leaves and young raspberry leaves.  In this post, I’ll write about just the raspberry leaves.  I’ll save the grape leaves for a future post.

young raspberry leaves


I like to consume some of the leafy greens in my diet in the form of green smoothies (the other part in salads; I’m not a big fan of sauteed greens).  My green smoothies consist of a few cups of washed greens and a few cups of frozen (or unfrozen) fruit and water.  My favorite fruits are frozen blueberries and frozen bananas but we also use pineapple, mulberries, raspberries, melons, peaches, grapes, etc.  I also started sprinkling some cinnamon and kelp granules into our smoothies.  You can taste the cinnamon goodness but thankfully not the kelp.  Sometimes I will put in some coconut milk.  What turned me on to green smoothies was Victoria Boutenko’s book  Green Smoothies   Consuming more leafy greens really resonated with me.  The benefit of increasing the amount of veggies in one’s diet is hard to argue with.  One of the most surprising things that I learned from her book is that greens are actually high in protein.  Sweet!

I choose young raspberry leaves and young grape leaves.  The raspberry leaves that I choose are just an inch or long; and, of course, they come as a set of three.  They are a much lighter and brighter green than the old leaves.  I simply pluck off the set of three with my thumb nail and middle finger.  I don’t take any of the thorny stem.  I have tasted the leaves plain and they really don’t have much of a taste.  I don’t put these in my salads or eat them as “trail nibble” because I do not think that they have a good mouth feel.  As a side note, raspberry leaves can be dehydrated and later steeped for tea.  Here are the benefits of the tea, according to Traditional Medicinals.

If you are new to gardening and/or wild edibles, you should definitely know what poison ivy looks like (for a variety of reasons).  I mention this because of the one similarity that raspberry leaves and poison ivy leaves have: the leaves grow in sets of three.  Perhaps you have heard the phrase: “leaves of three, let them be”.  This is good advice for people who are new to identifying plants.  However, as you examine the two plants side by side you will see some very distinct differences.  I will list out the characteristics of each.

Raspberry Plant:

  • thorny stem/cane grows upright for a few feet before making an arch back down to the ground as the stem continues to grow (note: some plants may be thornless)
  • leaves grow in sets of three (but sometimes five)
  • leaves have lots of small “teeth” along the edges (they serrated)
  • the underside of the leaves are silver-colored
  • leaves are astringent (pop a young leaf into your mouth and you won’t taste much but the leaf will give your mouth a very mild but strange sensation which someone called “cotton mouth”)

Raspberry leaf set with 5 leaflets and another leaf set turned over to show the silvery underside

Poison Ivy (info taken from this webpage of the site Poison Ivy, Oak & Sumac Information Center (linked below))

  • “It can appear as a ground cover, a shrub, or as a vine growing up a tree. Older vines are covered in fibrous roots resembling hair that grow into the supporting tree.”
  • “It has dull or glossy compound leaves on a long stem that are divided into 3 leaflets, each 2-4″ (5-10 cm) long. The leaflets can be slightly lobed, and are a dark waxy green, above, and light, fuzzier beneath. A short stem sets off the end leaf.”  My note: the leaves can also have a burnt orange color.
  • “Poison ivy grows throughout eastern North America…[and] can be found in Bermuda and the Bahamas. Poison ivy…grow[s] in open woods, thickets, fence rows, stone walls, roadsides, and waste places. On roadsides, it tends to be ground cover, and in sandy coastal areas, it tends to be an erect shrub. In woods, you’ll mostly see the vines on trees.”

This site is dedicated to poison ivy: Poison Ivy, Oak & Sumac Information Center.  I highly recommend the Poison Ivy Tutorial on their site to better familiarize yourself with poison ivy.  Another nice article on poison ivy (by Twin Eagles Wilderness School) is here.  And this pdf from jim mcdonald with close-up, color photos.

poison ivy leaf set with a raspberry leaf set in lower left side of the photo

Thanks for reading.  If you enjoyed this post, please click the “LIKE” button and consider subscribing via email, Twitter ,  Pinterest or your favorite reader.


Leave a comment »

Today’s Green Smoothie Combo

We are huge fans of “green smoothies” (introduced to me by Victoria Boutenko’s book Green Smoothies — she has several books on the topic of how awesome leafy greens are for health).  My children like them for the taste (and so do I) but I particularly like that I can get leafy greens into my children’s digestive system!

Today, after a wonderful (and hot) round of miniature golf, we headed home to cool down in the pool and with a green smoothie (NOT in the pool, thankyouverymuch).  Now, I don’t hide the fact from my children that I include leafy green in our smoothies but I have found that the boys prefer if the smoothies are not green in color.  Thank goodness for the awesome blueberries!  They make the smoothie pretty purple and they are super healthy as well!

Purple Green Smoothie

Today’s green smoothie includes:

  • frozen bananas
  • frozen blueberries
  • frozen, chopped kale (although more commonly, I use wild edible leafy greens such as wild spinach, purslane, young grape leaves, young raspberry leaves, violet leaves)
  • a sprinkle of cinnamon
  • a sprinkle of powdered astragalus
  • about a Tbsp. of chia seeds
  • juice of one lemon

Oh, my!  Yummy goodness!  I’d love to hear from you.  What do you like to include in your green smoothies?

Thanks for reading.  If you enjoyed this post, please click the “LIKE” button and consider subscribing via email, Twitter  or your favorite reader.

6 Comments »